Categories

vegetarian spinach ravioli lasagna

Easy Ravioli Lasagna

Easy Ravioli Lasagna - takes 10 minutes to prepare using only 5 ingredients.  This is so good!
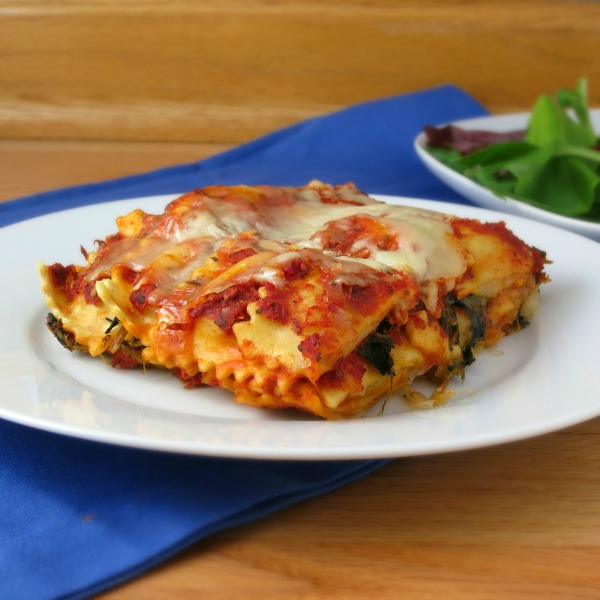
I am excited to share this recipe with you. Easy Ravioli Lasagna has become one of our favorite weeknight dinners!  It has the delicious flavor of lasagna yet is made with only 5 main ingredients and takes 10 minutes to prepare ~ perfect these days when I find myself juggling a newborn and a busy 3 year old at dinnertime.  This lasagna can also be made ahead (like before leaving for work or, in my case, before the kids wake up) so it’s ready to just pop in the oven at dinner.

Easy Baked Ravoli Lasagna

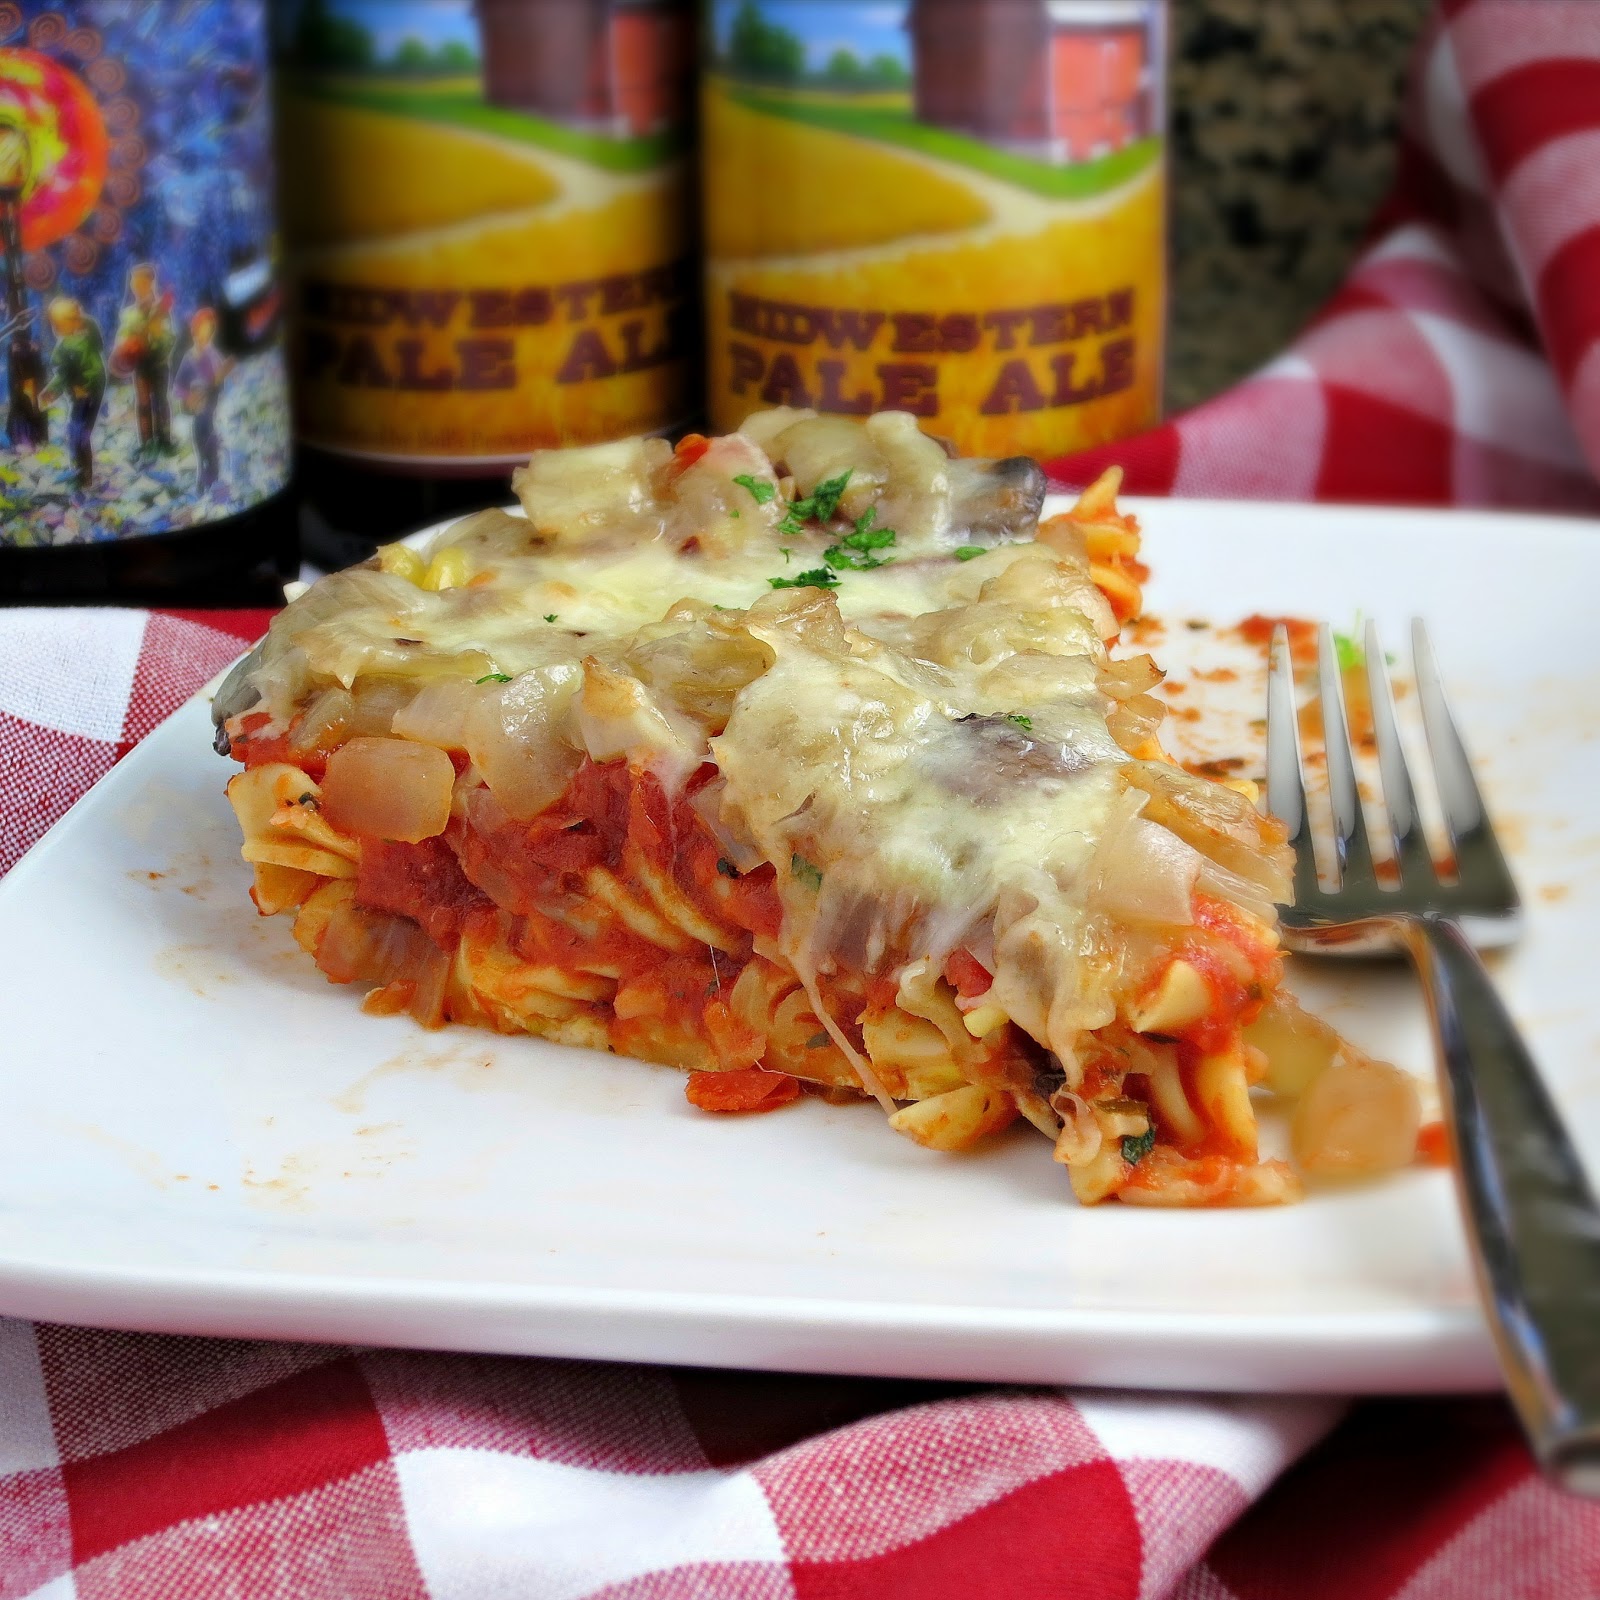
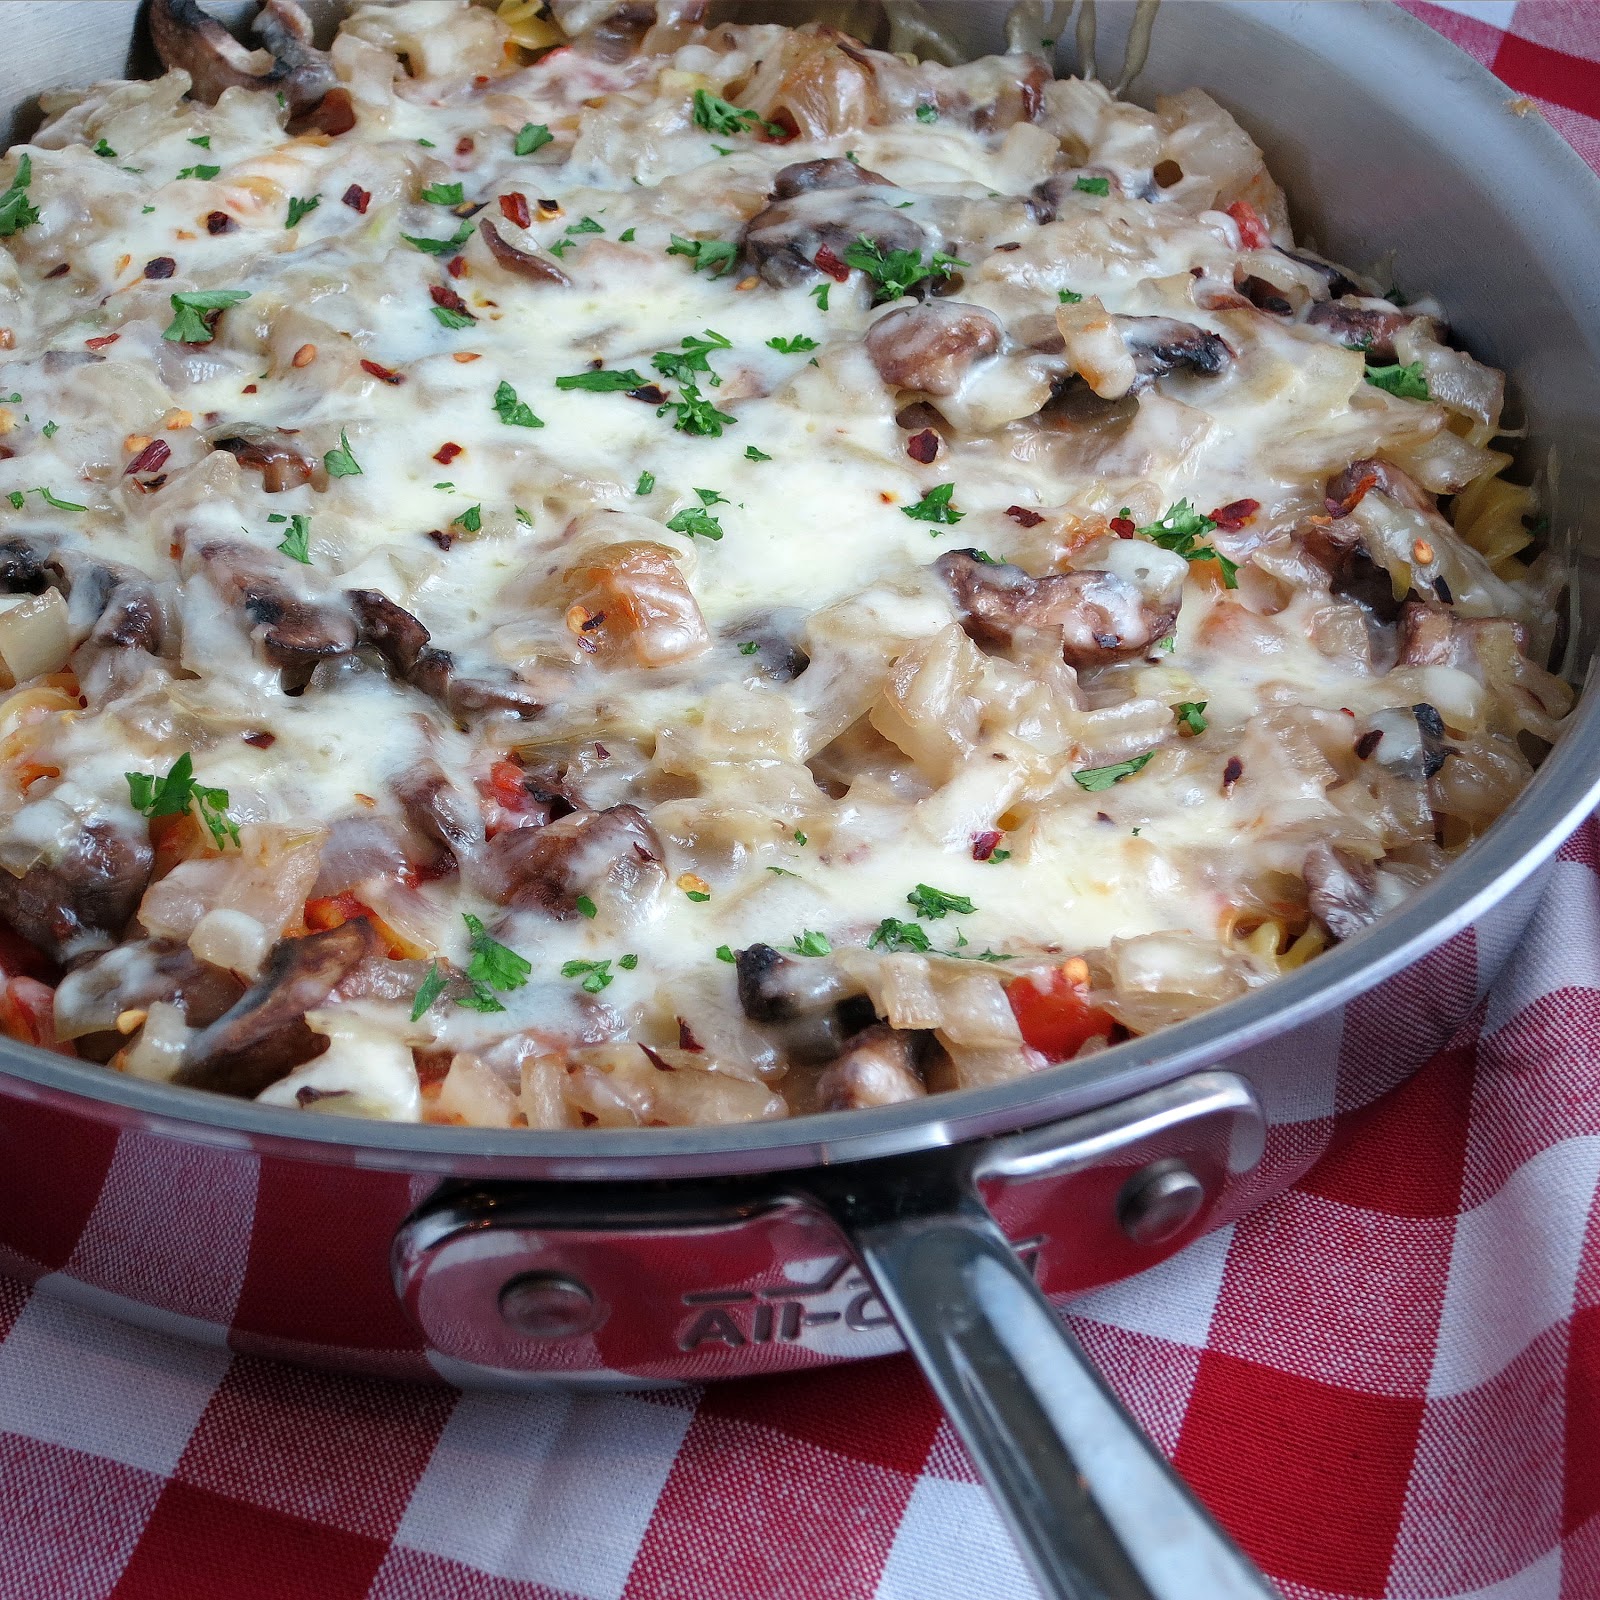
From the original recipe, I increased the sauce, added some red pepper flakes, and actually reduced the cheese (surprising for a cheese-lover like myself, but it was way too much and took away from the overall dish).  This Easy Ravioli Lasagna is made with spinach, but I think sautéed mushrooms and garlic would also be delicious.  We have made this several times, and it’s always a crowd-pleaser.  Speaking of crowds, this recipe can easily be doubled to fit a 13″x9″ lasagna pan and you’ll have enough to serve a crowd or have lots of leftovers for lunches.  It reheats beautifully!

Easy Ravioli Lasagna
 
Yields: 4 to 6 servings
Ingredients
  • 1½ cups pasta sauce (I use Muir Glen Tomato Basil)
  • 20-ounce package cheese ravioli (refrigerated or frozen)
  • 10 ounces frozen, chopped spinach, thawed and squeezed dry
  • 4 ounces (1 cup) shredded part-skim mozzarella
  • 2 tablespoons grated Parmesan
  • Crushed red pepper flakes, to taste (optional)
  • Cooking spray
Instructions
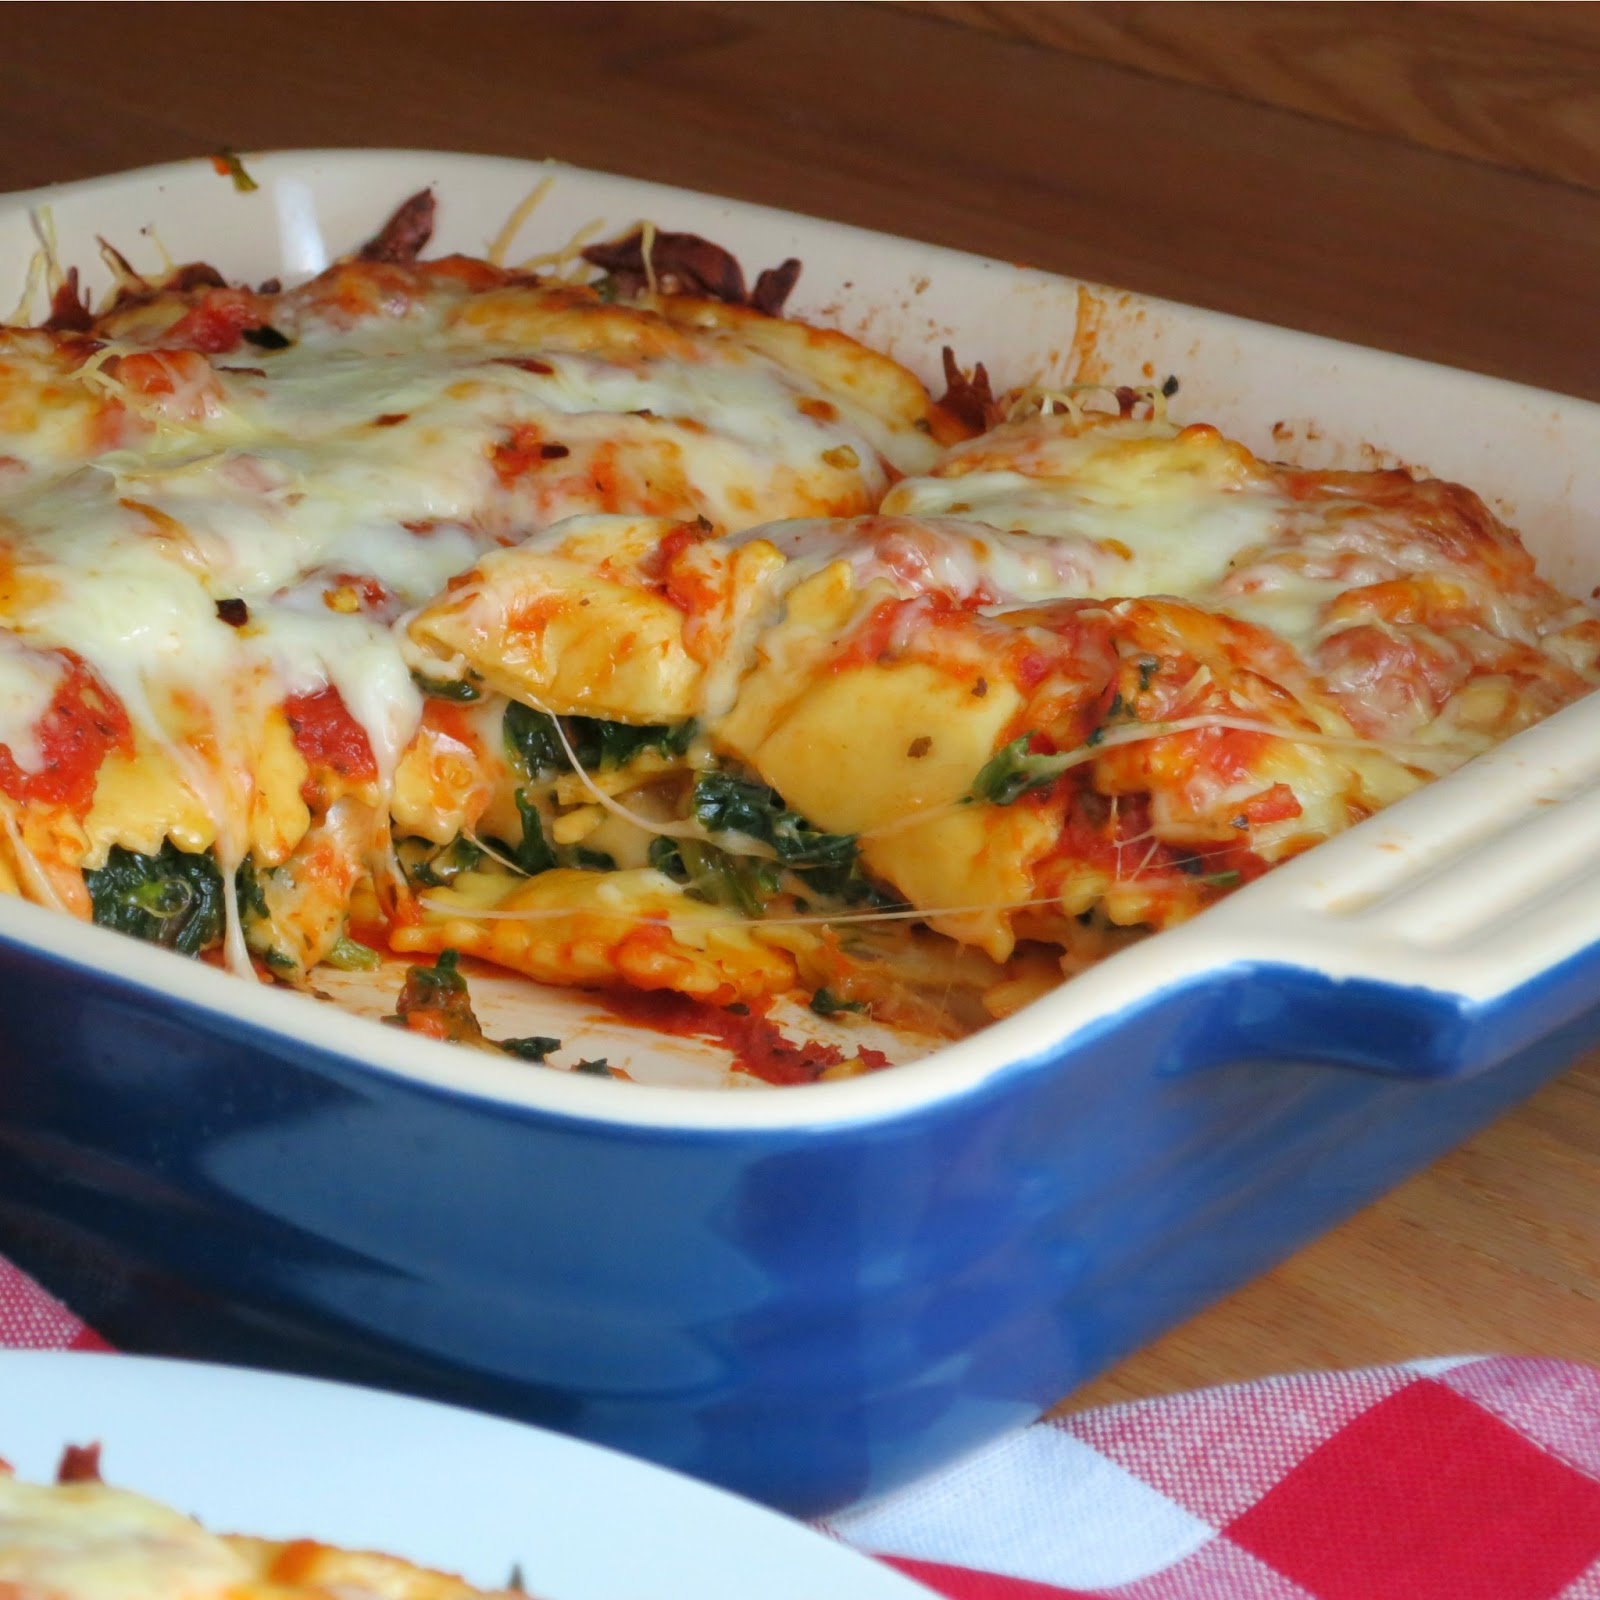
  1. Preheat oven to 375 degrees. Spray an 8-inch baking dish with cooking spray and set aside.
  2. Pour ½ cup pasta sauce over bottom of dish.
  3. Layer bottom of dish with half of the ravioli.
  4. Cover ravioli with ½ cup sauce and top with spinach and half of mozzarella (1/2 cup).
  5. Repeat with remaining ravioli, sauce and mozzarella. Sprinkle top with Parmesan and crushed red pepper flakes, if using.
  6. Cover dish with foil and bake for 30 minutes. Remove foil and bake until bubbling and starts to brown, about 10 minutes. Let cool for 5 minutes and then serve.

Slightly adapted from All You, March 2009

vegetarian spinach ravioli lasagna

Baked Garlic Parmesan Chicken

baked garlic parmesan chicken

Baked Garlic Parmesan Chicken puts a delicious twist on a classic favorite with some added garlic (which makes everything better!).  When I found this recipe, the title alone was so appealing, it vaulted to the top of the list and was made within a day.  I reduced the recipe to be made for two (but it can easily be multiplied for more!), added some heat with red pepper flakes and changed some of the amounts and proportions since the first time I made this, there was too much breadcrumb mixture leftover.  Served with a simple side salad or a favorite veggie, Baked Garlic Parmesan Chicken is a  healthy, quick and easy chicken dish that makes a perfect weeknight meal…or any time!

Baked Garlic Parmesan Chicken
 
Yields: 2 servings
Ingredients
  • Cooking spray
  • 1 tablespoon olive oil
  • ⅓ cup dry breadcrumbs
  • ¼ cup grated Parmesan cheese
  • 1-2 garlic cloves, minced
  • 1 teaspoon dried basil
  • Crushed red pepper, to taste
  • 2 4-5 ounce boneless, skinless chicken breasts
  • Salt and pepper, to taste
Instructions
  1. Preheat oven to 350 degrees. Line a baking sheet with foil and spray with cooking spray.
  2. In a shallow bowl, combine oil and garlic.
  3. In a separate bowl, combine bread crumbs, cheese, and basil. Add crushed red pepper to taste.
  4. Season chicken with salt and pepper to taste. Dip chicken in oil mixture and then in bread crumb mixture. Place coated chicken on prepared baking sheet. Repeat. Top with any remaining breadcrumb mixture and lightly spray tops with cooking spray.
  5. Bake for 30 minutes or until chicken in cooked thoroughly.

Adapted from All Recipes

healthy cocoa chocolate coconut date truffles balls

Healthy Chocolate Coconut Truffles

 Healthy Chocolate Coconut Truffles are an easy recipe made in minutes using only 3 ingredients with no added fat or sugar. {vegan, gluten free}

Healthy Chocolate Coconut Truffles | alidaskitchen.com
Healthy Chocolate Coconut Truffles have the delicious flavors of dark chocolate and coconut…all coming in around 60 calories and without any added sugar of fat.  They are made using only 3 main ingredients (plus an optional ingredient which helps to deepen and intensify the chocolate flavor).  Even better – they take only minutes to make.  Intrigued?  I certainly was when I first found the recipe but it took me over 9 months to make them.  I am kicking myself that it took so long…they are so amazingly good!

Healthy Chocolate Coconut Truffles | alidaskitchen.com

Thankfully, it is time again for the second installment of the Eating the Alphabet Challenge, hosted by Brenda of Meal Planning Magic.  Participating in this challenge was the extra push I needed to make these truffles.  This month we’re featuring healthy recipes using fruits, vegetables, grains or legumes that start with letters C or D.  Since Healthy Chocolate Coconut Truffles feature both coconut and dates, I’ve got both letters covered this month.

Healthy Chocolate Coconut Truffles | alidaskitchen.com

Healthy Chocolate Coconut Truffles
 
Yields: 20 truffles
Ingredients
  • 8 ounces pitted dates (approx 1½ cups)
  • 3 tablespoons unsweetened cocoa powder
  • 3 tablespoons unsweetened flaked coconut
  • 1 teaspoon espresso powder (optional)
  • ¼ cup unsweetened flaked coconut, for rolling
Instructions
  1. Put dates, cocoa, 3 tablespoons coconut and espresso powder in a food processor and puree until smooth. If mixture is too dry, add water by the teaspoonful (I needed about 3 teaspoons). If mixture becomes too wet, add more unsweetened coconut.
  2. Scoop mixture by the tablespoonful and form 1-inch balls. Roll balls in remaining coconut.
  3. Chill/store in refrigerator until ready to enjoy.

Source: Bon Appetit, June, 2012  

Pasta Pizza Pie

mushroom pasta pizza bake pie

Pasta Pizza Pie combines two Italian favorites (and two of my favorites!) into a delicious pizza-inspired baked pasta.  First, you start by baking a pasta “crust.”  Then you spread your favorite pasta sauce over the crust and top it with your favorite toppings.  I used a 12-inch saute pan in lieu of a pizza pan, and it worked great!

Pasta Pizza Pie puts a fun twist on pizza and a fun twist on pasta,…and incidentally since it’s also a “pie,” this Pasta Pizza Pie is perfect for today, March 14th (3.14)…”Pi Day!”


Pasta Pizza Pie
 
Yields: 4 servings
Ingredients
  • Cooking spray
  • 1 tablespoon canola oil
  • 1 large onion, chopped*
  • 1 cup sliced mushrooms (I used baby bellas)*
  • 2 garlic cloves, minced *
  • 1 egg, beaten
  • ¼ cup milk (I used skim)
  • 8 ounces (1/2 of a 1 pound box) rotini-shaped pasta, cooked and drained
  • 1 cup shredded part-skim mozzarella cheese (about 4 ounces)
  • 1½ cups of your favorite pasta sauce (I used Muir Glen Tomato Basil)
  • crushed red pepper flakes, to taste
  • * substitute with your favorite pizza toppings
Instructions
  1. Preheat oven to 350 degrees. Spray 12-inch saute pan or pizza pan with cooking spray and set aside.
  2. In a large skillet, heat oil over medium heat. Add onion and mushrooms and cook until tender, about 5 to 7 minutes, stirring occasionally. In the last minute, add minced garlic and stir for 1 minute. Remove from heat.
  3. In a medium bowl, stir egg, milk, pasta and ½ cup cheese. Spread pasta mixture in prepared pizza pan. Bake this pasta crust for 20 minutes.
  4. Remove pasta crust from oven and spread sauce over crust. Top with onion-mushroom mixture. Sprinkle with remaining cheese. Shake crushed red pepper flakes over cheese.
  5. Bake for 15 minutes, or until cheese is melted. Let stand 5 minutes before serving.

Source: Campbell’s Kitchen

healthy blueberry strawberry blackberry yogurt smoothie

Diet Mixed Berry Smoothie

healthy diet mixed blueberry strawberry blackberry yogurt smoothie

This Diet Mixed Berry Smoothie is quick and easy to make and perfect for breakfast on a busy morning, a post-workout recovery drink, or an afternoon pick me up.  Made with just a few healthy ingredients, it’s a vitamin-packed smoothie that can be enjoyed anywhere, anytime (and portable too for when you’re on-the-go!).


Recently, I was given the opportunity to try Ocean Spray’s Diet Juice Drinks and thought it would a tasty addition to this smoothie recipe.  At only 5 calories per serving, swapping out full-calorie juices in favor of Ocean’ Spray’s Diet Juice Drinks can help save calories (and carbs, if that’s a concern), while still tasting delicious.   For this recipe, I used Ocean Spray’s Diet Cranberry juice and it went nicely with the berries used in the rest of this smoothie.  For next time, I have my eyes on the Diet Blueberry Pomegranate!

To learn more about Ocean Spray’s Diet Juice Drinks, visit http://www.oceanspray.com/Products/Juices/Diet-Light/Diet-Cranberry-Juice-Drink.aspx.


Diet Mixed Berry Smoothie
 
Yields: 1 servings
Ingredients
  • ½ cup Diet Ocean Spray Cranberry Juice Drink, any flavor
  • ½ cup frozen mixed berries (strawberries, raspberries, blackberries and blueberries)
  • 1 ripe banana, frozen and cut into slices
  • 3 ounces fat free plain or berry-flavored Greek yogurt
  • 1 tablespoon flaxseed (optional)
Instructions
  1. Combine all ingredients in a blender (or Magic Bullet). Blend on high speed until ingredients are thoroughly combined. Pour into a chilled glass. Enjoy!
Notes
Tip: slice banana before freezing...it's much easier!

 Adapted from Ocean Spray


I have partnered with Ocean Spray through DailyBuzz to help promote their new Ocean Spray Diet product. I have been compensated for my time commitment to work with this product, however my opinions are entirely my own and I have not been paid to publish positive comments.

Baked Balsamic Chicken | alidaskitchen.com

Baked Balsamic Chicken

Tracking Pixel

Baked Balsamic Chicken is wholesome, easy and delicious!  This dish can be customized to use whatever herbs you like (or have on hand) and is perfectly paired with Minute® Multi-Grain Medley! Thank you Minute® Rice for sponsoring this post.
Baked Balsamic Chicken | alidaskitchen.com
 This Baked Balsamic Chicken recipe has been a family favorite for years. The recipe was created when Greta was first born over 3 years ago and has been a regular feature on the dinner rotation ever since. The marinade takes minutes to prepare and then is poured in a zip-top bag with the chicken.  Let that sit in the refrigerator until you’re ready to bake.  Then you just pour the chicken and marinade in a baking dish and bake.  Simple!

Read more

Lemon Buttermilk Cake

easy lemon buttermilk breakfast pound cake


We had a special surprise arrive last Friday ~ our baby decided to arrive a little early!  Naturally, when there is a birthday, there must be a birthday cake.  This Lemon Buttermilk Cake is quick and easy enough for a sleepy mama to whip together in minutes.  It’s not only simple to make, but the lemon cake is perfectly lemon-y, refreshing and delicious.  To dress it up, I added a simple lemon buttermilk glaze to drizzle over the loaf, with some extra to drizzle on the slices.  This cake is so good as-is, but the glaze adds a little something that makes it feel extra special.  Adam could not get enough of the baby’s birthday cake, and I discovered that despite not being a frosting person, he loves glaze.  Who can blame him!

Now to the baby details!  We had a baby girl named Greta Rose.  She is an easy baby so far and super sweet.  Seems fitting I guess, because the same could be said about Lemon Buttermilk Cake! 🙂

easy lemon buttermilk breakfast pound cake with lemon glaze


Lemon Buttermilk Cake
 
Yields: 8 to 10 servings
Ingredients
  • 2 cups all-purpose flour
  • 2 teaspoons baking powder
  • ½ teaspoon salt
  • 1½ cups granulated sugar
  • ½ cup canola oil
  • ¾ cup buttermilk, well-shaken
  • 2 eggs
  • 1 tablespoon lemon zest (finely grated, approx 2 lemons)
  • ¼ cup lemon juice (approx 1½ lemons)
  • 1 teaspoon vanilla extract
  • Cooking spray
  • GLAZE:
  • 1 cup powdered sugar
  • 1½ tablespoons fresh lemon juice
  • 1 to 2 tablespoon(s) buttermilk, well-shaken
Instructions
  1. Preheat oven to 350 degrees. Spray 8"x4" loaf pan with baking spray and set aside.
  2. In a large bowl, whisk together flour, baking powder and salt.
  3. In a medium bowl, add the sugar, oil, buttermilk, eggs, zest, juice and vanilla and whisk to combine.
  4. Add buttermilk mixture to flour mixture and whisk to combine. Pour into prepared loaf pan.
  5. Bake for 65 to 75 minutes, or until a toothpick inserted into the center comes out clean. Let cool in pan for 15 minutes and then transfer to a wire rack to cool completely.
  6. To prepare glaze, in a small bowl, whisk the powdered sugar, lemon juice and buttermilk until well-blended. Drizzle over cooled cake, as desired.

Sources: Real Simple for the cake, Cooking Light for the glaze

Apricot White Chocolate Scones

lighter dried apricot white chocolate chip scones


Happy New Year!  For a special New Year’s Day breakfast, I made these Apriot White Chocolate Scones.  I always forget how quick and easy scones are to make, plus they are much more economical to make at home than to buy them from a local coffee shop.  Tastier too!  The slight tartness of the dried apricots and the sweetness of the white chocolate chips are such a wonderful complement.  I made several changes to the original recipes to lighten it up a bit:  used fat free evaporated milk instead of half and half, used light butter and also replaced some flour with whole wheat pastry flour.  The result was a delicious scone with a nice, moist texture (no dry scones here!).

Apricot White Chocolate Scones
 
Yields: 8 scones
Ingredients
  • 1 cup all-purpose flour
  • ¾ cup whole wheat pastry flour
  • ¼ cup packed brown sugar
  • 2 teaspoons baking powder
  • ⅓ cup cold butter, cut in pieces (I used light butter)
  • ⅓ cup chopped dried apricots
  • ⅓ cup white chocolate baking chips
  • 1 egg
  • ⅓ cup fat free evaporated milk
  • melted white chocolate and additional chopped apricots, for topping (optional)
Instructions
  1. Preheat oven to 400 degrees. Line a cookie sheet with parchment paper and set aside
  2. In a food processor, pulse flours, sugar and baking powder until combined.
  3. Add butter to food processor and pulse until fine crumbs form. Pour mixture into a medium bowl.
  4. Stir apricots and white chocolate chips into flour mixture. Stir in egg and gradually add evaporated milk until dough forms a ball (Note: You may need slightly less than ⅓ cup). Knead dough a few times while in bowl.
  5. Pat or roll dough into 8-inch round on prepared cookie sheet. Cut into 8 wedges (a pizza cutter works well) but DO NOT separate.
  6. Bake for 15 to 20 minutes, or until golden brown and a toothpick inserted in the center comes out clean. Let sit on pan for 5 minutes and then separate wedges (Note: I used a serated knife to ensure clean cuts). Let cool completely.
  7. Optional set: Drizzle melted white chocolate and sprinkle with chopped dried apricots, if desired.


Slightly adapted from Betty Crocker

Chewy Ginger Cookies

Chewy Ginger Cookies

Chewy Ginger Cookies

This is my favorite recipe for Chewy Ginger Cookies. They are soft, chewy, with warm flavors of ginger and molasses, plus they take 10 minutes to prepare!

When it comes to holiday baking, I enjoy trying new recipes, but I also like to have some go-to recipes.   Standby recipes that are guaranteed to be crowd pleasers and are easy to make.  For years, I have been trying to find that special recipe for a ginger cookies.  These Chewy Ginger Cookies are the top contender for becoming that special recipe.  They are super soft and chewy with the warm flavors of ginger and molasses in each bite.   The dough takes less than 10 minutes to make, which is always a bonus!

This marks the final week of the 12 Weeks of Christmas Treats hosted by Meal Planning Mom.  Be sure to check out the thumbnails at the bottom of this post for more delicious holiday treats!

Chewy Ginger Cookies
 
Yields: 30 cookies
Ingredients
  • ½ cup butter, softened
  • ½ cup granulated sugar
  • 2 cups all-purpose flour
  • ½ teaspoon baking soda
  • ½ teaspoon ground ginger
  • ¼ teaspoon cinnamon
  • ¼ teaspoon salt
  • ½ cup molasses
  • ¼ cup water
  • Additional sugar, for rolling
Instructions
  1. In a medium bowl, whisk together flour, baking soda, ginger, cinnamon and salt.
  2. Mix molasses and water in a liquid measuring cup, and stir until combined (Note: you may need to stir again before adding to butter mixture).
  3. In a large bowl, cream butter and sugar until combined. Beating on low, alternately add flour mixture and molasses mixture to the butter mixture, until fully combined. Refrigerate for at least 2 hours to overnight.
  4. Preheat oven to 350 degrees. Line cookie sheets with parchment paper and set aside.
  5. Roll a rounded tablespoonful of dough into a ball and then roll the ball in granulated sugar. Place on prepared baking sheet. Bake for 12 to 14 minutes or until edges are set (be careful not to overbake). Remove to wire rack to cool completely.

Slightly adapted from Taste of Home: Best Loved Cookies and Bars


We are to Week #12 of the 12 Weeks of Christmas Treats hosted by Meal Planning Magic. Be sure to check out all the other bloggers who are participating this week in the 12 Weeks of Christmas Treats blog hop.


pumpkin cream cheese filled cupcakes

Pumpkin Surprise Cupcakes

pumpkin cream cheese filled cupcakes

So I couldn’t help myself…I had to share one last pumpkin recipe with you.  It’s a good one.  Pumpkin Surprise Cupcakes are a moist, delicious pumpkin cake with a cream cheese surprise in the middle.  A little sprinkling of powdered sugar on top is all these cupcakes need before presenting, which makes them ideal for travel or eating at a gathering since they won’t get all messy.  While these cupcakes can hold their own without any frosting, they would also be really good with a little Cinnamon Cream Cheese Frosting if you want to get fancy.  Pumpkin Surprise Cupcakes are an easy, portable and fun little pumpkin alternative to tomorrow’s traditional pie.


By the way, can you believe we’re already in Week #9 of the 12 Weeks of Christmas Treats!  Due to the Thanksgiving holiday this Thursday, many of us are posting starting today through the rest of the week, so be sure to check out all of the yummy treats by clicking on the thumbnails at the bottom of this post.

Have a Happy Thanksgiving!!

Pumpkin Surprise Cupcakes
 
Yields: 24 cupcakes
Ingredients
  • 2 cups all-purpose flour
  • 2 teaspoons baking powder
  • 2 teaspoons cinnamon
  • 1 teaspoon baking soda
  • pinch of salt
  • 1 can (15 ounces) pure pumpkin
  • 2 cups granulated sugar
  • 1 cup canola oil
  • 4 eggs
  • 1 teaspoon vanilla
  • 8 ounces light cream cheese, softened
  • ⅓ cup granulated sugar
  • 1 egg
  • Powdered sugar, for topping (optional)
Instructions
  1. Preheat oven to 350 degrees. Line 2 12-cup muffin tins with paper liners and set aside.
  2. In a small bowl, whisk together the flour, baking powder, cinnamon, baking soda and salt. Set aside.
  3. In a large bowl, beat pumpkin, sugar, oil, eggs and vanilla until combined. Add flour mixture to pumpkin mixture, gently folding until well-blended.
  4. FILLING: In a separate small bowl, beat cream cheese and sugar until smooth. Add egg and beat on low until just combined.
  5. Fill muffin cups approximately one-third full. Distribute evenly among cupcakes, dropping a generous tablespoonful in the enter of each cupcake. Cover with remaining batter.
  6. Bake for 20 to 25 minutes, or until a toothpick inserted in the pumpkin cake portion comes out clean. Cool for 10 minutes before moving to a wire rack to cool completely. Dust with powdered sugar just before serving (or frost as desired).

Source: Taste of Home


Be sure to check out all the other bloggers who are participating this week in the 12 Weeks of Christmas Treats blog hop. And if you’re a blogger and want to join in on the fun, check out this post for the form to fill out to start baking along with us.