Categories

Cocoa Pebbles Dirt Pudding {alidaskitchen.com}

Cocoa Pebbles Dirt Pudding

Follow my blog with Bloglovin

This shop is part of a social shopper marketing insight campaign with Pollinate Media Group™ and Post Pebbles but all my opinions are my own. #pmedia #PebblesBTS  http://cmp.ly/3/8vNxcO 

walgreens-pebbles-collage

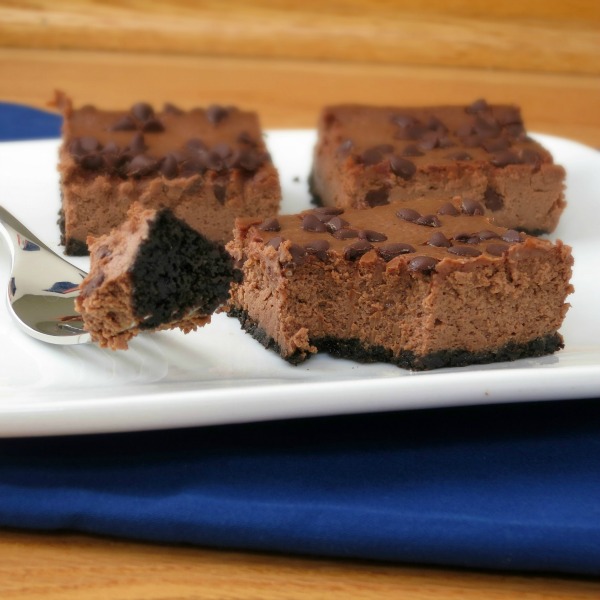
The other day Adam and I made a trip to Walgreens for some Post Pebbles Cereal, but if you follow Alida’s Kitchen on Instagram, you already know this.  I had several tasty recipe ideas swirling about, but also wanted to show Adam that you can take everyday items, such as cereal, and be creative.  While I do have an easy recipe to share with you, first I have to tell you about the fun project we made with our Pebbles Cereal!…

Read more

Cheesy Broccoli Penne Pasta {Alida's Kitchen}

Cheesy Broccoli Penne Pasta


Cheesy  Broccoli Penne Pasta...made on the lighter side!  {Alida's Kitchen}

Cheesy Broccoli Penne Pasta dish is made on the lighter side with a light cheddar and Parmesan sauce and fresh broccoli.  A quick and healthy stove top meal, this is a great weeknight dinner! 

We love cheesy pasta dishes, and generally the more cheese the better, right?   In summer months we tend to gravitate to lighter meals, leaving our beloved cheesy baked pasta dishes by the wayside.  They can be a bit heavy, and while I love baked pasta, I don’t always love to turn on the oven when the temperatures rise.   That’s where this Cheesy Broccoli Penne Pasta dish is perfect.  It has a light cheddar and Parmesan cheese sauce ~ just enough to coat the pasta and broccoli.  And it’s all made on the stove top in under 30 minutes.  You can’t beat that!…

Read more

healthy whole wheat banana buttermilk muffins

Banana Buttermilk Muffins

Banana Buttermilk Muffins are healthy muffin recipe that is not only delicious, but takes 10 minutes to prepare. These are sure to become a household favorite!

a healthy banana buttermilk muffin recipe

While I thought it was safe to assume that Pumpkin Banana Muffins are Adam’s favorite muffin, these Banana Buttermilk Muffins  may quickly take the top spot, if they haven’t already.  Within the first week of making the first batch, I had to make another…and another!  It seemed that Adam and Mike (and I too!) were devouring these faster than I could make them.  Fortunately, they are super quick and easy to make!  The hands on time takes about 10 minutes, and for some reason, these just seem easier to make than other muffins….

Read more

Marble Cake with Fudge Frosting

Marble Cake with Fudge Frosting is the perfect party cake!  Enjoy a swirl of yellow cake and chocolate cake in every bite, topped with a fudgy chocolate frosting.  Delicious, a crowd favorite, and easy to make!

marble-cake-with-fudge-frosting-sqc

Recently, we celebrated Mike’s birthday, and as always I asked him to pick his birthday treat.  He usually just tells me to make whatever, but this year he got some advice from our resident 3 year old (who may be a bit opinionated these days).  After consulting a couple of his favorite cookbooks (really!) and a few of my printed recipes, Adam’s decision was made ~ Marble Cake with Fudge Frosting.  While Adam had never had marble cake before, and at the time was not a fan of chocolate, he was sure this was the perfect cake for his daddy.  He was absolutely right!

With yellow cake and chocolate cake in a pretty little swirl, we enjoyed the best of both worlds and the fudge frosting was the perfect icing on the cake (ha!)   And while it looks fancy, this cake is super simple to make.  The frosting was a bit stiff during the stirring process and goes on thick, yet is a thin layer on top of the tasty cake.  Decorate it as you wish, and here is the perfect party cake to celebrate any special occasion.

Marble Cake with Fudge Frosting - Alida's Kitchen

Marble Cake with Fudge Frosting
 
Marble Cake with Fudge Frosting is the perfect party cake! Enjoy a swirl of yellow cake and chocolate cake in every bite, topped with a fudgy chocolate frosting.
Yields: 16-20 servings
Ingredients
  • Cake:
  • 3 cups all-purpose flour
  • 2 teaspoons baking powder
  • 1 teaspoon baking soda
  • ½ teaspoon salt
  • ⅓ cup unsweetened cocoa
  • 1¼ cups granulated sugar, divided
  • ½ cup unsalted butter, softened
  • 3 eggs
  • 1 cup milk (I used skim)
  • 2 teaspoons vanilla
  • Cooking spray
  • Frosting:
  • 1½ cups semisweet chocolate chips
  • 3 tablespoons unsalted butter, softened
  • 2 cups powdered sugar
  • ¼ cup milk (I used skim)
Instructions
  1. FOR THE CAKE: Preheat oven to 350* F. Spray a 13x9-inch baking pan with cooking spray and set aside.
  2. In a medium bowl, whisk the flour, baking powder, baking soda and salt.
  3. In a separate medium bowl, combine cocoa, ¼ cup granulated sugar and ¼ cup water.
  4. In a large bowl, with an electric mixer (hand or stand) set to medium-high, beat butter and remaining sugar until light and fluffy. Reduce speed to low, and add eggs, milk and vanilla, beating until smooth. Add flour mixture, continue beating on low until combined.
  5. Pour 2 cups of the vanilla batter into the bowl with the cocoa mixture, and stir until smooth.
  6. Pour vanilla batter into the prepared baking pan. Spoon chocolate batter into six puddles on top of the vanilla batter. Drag a knife through the two batters, creating a swirly marble effect.
  7. Bake 22 to 25 minutes, or until a toothpick inserted in the center comes out clean. Remove from oven to a wire rack to cool completely. Frost once cool.
  8. FOR THE FROSTING: Put chocolate chips in a glass or metal bowl set over a pan of simmering water (or use a double-boiler), until melted, stirring occasionally. Remove from heat and add butter, powdered sugar and milk. Beat on high until frosting comes together. Add more milk or sugar as needed to achieve desired consistency. (If frosting is too stiff, add more milk; if it's too wet, add more powdered sugar)
  9. Spread over cooled cake and decorate as desired.

Source: Real Simple

Marble Cake with Fudge Frosting - Alida's Kitchen

Mediterranean Lentil Salad

Mediterranean Lentil Salad

vegan mediterranean vegetable lentil salad with balsamic vinaigrette and feta cheese


Mediterranean Lentil Salad is a healthy, protein-packed, veggie-rich grain salad, mixed with a tangy balsamic vinaigrette.   There are so many delicious flavors at play here, with red onions, garlic, parsley and, of course, the balsamic vinaigrette.  This easy recipe is a great base recipe with lots of flexibility to customize it to your preference.  You could add spinach, change up the amounts of tomatoes, onions, etc.  Mediterranean Lentil Salad can also be vegan by simply omitting the feta cheese.

I really like using lentils because they are such a great source of lean protein and high fiber and iron too.  Per the bag I used, there are 12 grams of protein and 14 grams of fiber…all with zero fat.   I find lentils to be a great meat substitute in recipes, such as tacos.  In fact, I am putting the final tweaks on a lentil taco recipe to share with you soon!

Mediterranean Lentil Salad
 
Yields: 4 servings
Ingredients
  • 1 cup chopped red onion, plus 1 1-inch thick slice (for cooking water)
  • ¼ cup chopped fresh parsley, plus 3 parsley sprigs (for cooking water)
  • 2 garlic cloves, minced
  • 1 cup dried lentils, sorted and rinsed
  • 1 cup halved cherry (or grape) tomatoes
  • ½ cup diced cucumber
  • ½ cup feta cheese, divided
  • salt and pepper to taste
  • For the balsamic vinaigrette:
  • 1 tablespoon olive oil
  • 1 tablespoon water
  • 3 tablespoons balsamic vinegar
  • 2 teaspoons Dijon mustard
  • 1 garlic clove, minced
Instructions
  1. COOK LENTILS: Add 2½ cups of water to a medium sauce pan and bring to a boil. Add onion, parsley sprigs and minced garlic and bring to a boil. Stir in lentils, reduce heat to a simmer, and cook uncovered until lentils are tender (about 20-25 minutes). Drain and discard onion and parsley.
  2. MAKE VINAIGRETTE: In a small bowl, whisk together vinegar, water, vinegar, mustard and garlic until combined. Pour into a sauce pan (I just used the same pan used to cook the lentils) and heat on low until just warmed (do not boil).
  3. ASSEMBLE: Place warm lentils in a serving bowl. Add cucumber, tomatoes, chopped parsley, ¼ cup feta and warm vinaigrette and toss to combine. Add salt and pepper, to taste. Sprinkle with remaining ¼ cup feta and serve.

It’s my favorite time of month again…the Eating with the Alphabet Challenge hosted by Brenda from Meal Planning Magic!  This month we were to showcase a recipe using a fruit, vegetable or grain that begin with the letters K or L.  Lentils are the first that came to mind, and I had so much fun trying different, healthy recipes with them.  If you’re a blogger, why not join us!  It’s fun to come up with new, healthy recipes as well as see what other bloggers decide to make.   Brenda has more information and sign up details here.


sunflower seed butter buttermilk waffles

Sunbutter Waffles

Sunbutter Waffles - whole wheat, buttermilk waffles made nut-free with sunflower seed butter.  Kids LOVE these!

Sunbutter Waffles are whole wheat, buttermilk waffles made with sunflower seed butter instead of peanut butter (or other nut butter), making them a nut-free alternative.  While perfect just as-is, we also enjoy them topped with additional sunbutter, berries or maple syrup.

We have had a waffles iron for years, but for whatever reason it hasn’t been used much…well, until recently.  If you’re a regular reader, you know how much my Adam loves pancakes.  At least once per week, I make his favorite kind(s) of pancakes to load up the freezer and/or just to have on hand.  Sometimes I would end up making a double (or triple!) batch.  On my small little griddle, this exercise could take hours.  A labor of love I guess.  These days, with a newborn in the house, it’s a bit tricky to devote that much time to cooking or baking anything.  On a whim, I decided to try my hand at waffles.  Due to Adam’s peanut allergy, I opted to transform my beloved peanut butter waffles into sunbutter waffles.  I was pleased to discover cooking waffles is much quicker than flipping pancakes.  And Adam had 5 waffles for breakfast that day.   Operation waffle was a success!

Sunbutter Waffles - healthy whole wheat, buttermilk waffles made nut-free with sunflower seed butter.  Kids LOVE these!


For another recipe using sunbutter, try these Cocoa Crispy Sunbutter Bars.  They make a great snack!

Sunbutter Waffles
 
Yields: 6 servings
Ingredients
  • 1¾ cups whole wheat pastry flour (or all-purpose flour)
  • 2 tablespoons packed brown sugar
  • 2 teaspoons baking powder
  • 1 teaspoon baking soda
  • pinch salt
  • ¼ cup canola oil
  • 6 tablespoons sunflower seed butter
  • 2 cups buttermilk
  • 2 eggs
  • 1 teaspoon vanilla extract
Instructions
  1. In a large bowl, whisk flour, sugar, baking powder, baking soda and salt.
  2. In a medium bowl, with a hand mixer, beat oil and sunflower seed butter until smooth. Add buttermilk, eggs and vanilla and stir until incorporated.
  3. Add buttermilk mixture to the flour mixture, stirring until combined. Let mixture sit for 10 minutes.
  4. Meanwhile, preheat waffle iron. Cook waffles according to the manufacturer directions for your waffle iron.
Notes
Note: Store leftovers in the refrigerator and toast to reheat. These also freeze well.

Adapted from Everyday Food


Jalapeno Popper Pasta


Jalapeno Popper Pasta from alidaskitchen.com

Jalapeno Popper Pasta is a cheesy, spicy dish where comfort food meets an appetizer favorite.  This grown-up mac ‘n cheese dish is filled with tasty jalapeno peppers, topped with garlic breadcrumbs and  is made a little lighter too!

Jalapeno Popper Pasta

While Mike and I were pretty sure we would enjoy Jalapeno Popper Pasta, because I mean really…between the cheese and garlic breadcrumbs and a nice kick from the jalapenos…it’s a safe assumption, right?  Well, this is how it typically goes down when I want to photograph our dinner for the blog.  I load up a plate for photos and head over to my photo spot.  I tell Mike to go ahead and start without me, but he always says he wants to wait.  (He might sneak a bite or two).  Photos take anywhere from 5 to 15 minutes depending on various factors, and then we eat!  These photos didn’t take long, maybe 5 minutes.  I went to the table, and Mike had already finished.  He just smiled and went to load up for seconds.  It’s that good!

If you’re lucky enough to have a garden full of jalapenos, this Jalapeno Popper Pasta is a delicious, new and different way to use them up.

Jalapeno Popper Pasta from alidaskitchen.com


Jalapeno Popper Pasta
 
Yields: 4 servings
Ingredients
  • 8 ounces pasta (rotini, gemelli, or any other similar shape will work)
For the Garlic Breadcrumbs:
  • ¼ cup panko breadcrumbs
  • 1 teaspoon canola oil
  • 1 garlic clove, minced
  • pinch salt
For the Sauce:
  • 1 tablespoon extra virgin olive oil
  • 1 cup chopped yellow onion
  • 1 to 2 garlic cloves, minced
  • 2-3 jalapeno peppers, minced (to yield approx ¼ cup)
  • 6 ounces reduced-fat cream cheese, cut into 6 pieces
  • 1 cup skim milk
  • 1 cup Monterey jack cheese
  • 1 teaspoon chili powder
  • salt and pepper, to taste
Instructions
  1. COOK PASTA: Cook pasta according to package directions to al dente. Drain and set aside.
  2. MAKE BREADCRUMBS: Meanwhile, heat oil in a medium, nonstick skillet and add breadcrumbs and (1 clove) minced garlic. Stir frequently until breadcrumbs begin to brown and garlic is fragrant. Add a pinch of salt, remove from heat and set aside.
  3. MAKE SAUCE: In a large saute pan, heat olive oil over medium-high heat. Add onion and cook for about 5 minutes. Add peppers and cook for 3 minutes, or until onion and peppers are softened. Add garlic during the last minute, cooking until fragrant.
  4. Reduce heat to medium and add cream cheese to onion mixture. Stir until melted. Add milk, stirring until incorporated. Add cheese and chili powder and stir until melted and smooth.
  5. PUT IT TOGETHER: Remove sauce from heat. Add cooked pasta to sauce and toss until combined. Add salt and pepper to taste.
  6. SERVE: Divide on serving plates and sprinkle with 1 tablespoon of garlic breadcrumbs. Top with jalapeño rings for garnish (optional).
Notes
Adapted from Rachael Ray

Jalapeno Popper Pasta from alidaskitchen.com
 
It’s my favorite time of month again…the Eating with the Alphabet Challenge hosted by Brenda from Meal Planning Magic!  This month we were to showcase a recipe using a fruit, vegetable or grain that begin with the letters I or J.  I obviously went with J for jalapeño.

The past few months, I have been able to knock out several recipes from my bucket list with this challenge, and each of these recipes have become household staples.  Gotta love a 3 year old who can’t get enough of roasted chickpeas (we go through 1 can every 1 to 2 days!)

Baked Sweet and Sour Chicken with Quinoa

Baked Sweet & Sour Chicken with Quinoa | alidaskitchen.com

Baked Sweet and Sour Chicken is a healthy 30-minute meal made with chicken, lots of vegetables, and a light sweet and sour sauce.  It takes just minutes to prepare, making this Baked Sweet and Sour Chicken an ideal weeknight meal that is much healthier than its take-out counterpart.

Here the Baked Sweet and Sour Chicken is served over the ever trendy super-seed, quinoa.  You can easily substitute brown rice, or another favorite grain, or eliminate it all together for a lower carb option.

healthy baked sweet and sour chicken with quinoa | alidaskitchen.com

Baked Sweet and Sour Chicken with Quinoa
 
Yields: 4 servings
Ingredients
  • 3 tablespoons honey
  • 1 tablespoon ketchup
  • 1 tablespoon reduced-sodium soy sauce
  • 1 tablespoon rice vinegar
  • 1 teaspoon ground ginger
  • 1 tablespoon water
  • 1 pound boneless, skinless chicken breast, cut into 2-inch pieces
  • 1 red bell pepper, cored, seeded and cut into 1-inch pieces
  • 1 green bell pepper, cored, seeded and cut into 1-inch pieces
  • 1 large carrot, peeled and cut into thick coins
  • 6 scallions, trimmed and cut into 2-inch pieces
  • 1 cup quinoa, rinsed
  • 2 cups low-sodium vegetable broth
  • salt and pepper, to taste
  • nonstick cooking spray
Instructions
  1. Preheat oven to 400 degrees. Spray 13x9-inch baking dish with nonstick cooking spray and set aside.
  2. In a medium bowl, whisk honey, ketchup, soy sauce, vinegar, ginger and 1 tablespoon water.
  3. Toss chicken in 3 tablespoons of honey mixture and place in prepared baking dish. Toss peppers, carrots and scallions in remaining honey mixture and pour evenly over chicken.
  4. Loosely cover baking dish with foil, leaving one end open to vent. Bake for 25 to 35 minutes, or until chicken is thoroughly cooked and vegetables are tender.
  5. Meanwhile, put quinoa and broth in a medium sauce pan. Bring to a boil over high heat. Then cover, reduce to a simmer (medium-low) for 15 minutes, or until liquid is absorbed and quinoa is tender. Season with salt and pepper, as desired.
  6. Divide quinoa on plates and spoon chicken and vegetables over quinoa.
Notes
Slightly adapted from Family Circle, June 2013

If you enjoy this recipe, you may also enjoy:

Buffalo Chicken Quinoa Salad

Lighter Sesame Chicken


Oreo Cookies and Cream Muffins

oreo cookies and cream muffins

Oreo Cookies and Cream Muffins are a tasty vanilla muffin studded with large chunks of chocolate sandwich cookies throughout.  If you like Oreos (or Joe Joe’s!) and are looking for a fun recipe to try with them, these muffins are for you.    While Oreo muffins are not something that I would make every day, after making the crust for my Lighter Chocolate Cheesecake Bars, I found myself with leftover Oreos (if there is such a thing).  Why not try something new for a change!  Oreo Cookies and Cream Muffins are glorious and definitely something worth trying if you’re a cookies and cream lover, like myself!

Oreo Cookies and Cream Muffins
 
Yields: 12 muffins
Ingredients
  • 1¾ cups all-purpose flour
  • ¼ cup granulated sugar
  • 1 tablespoon baking powder
  • ⅓ cup cold butter, cut into 12 pieces
  • 1 cup milk (I used skim)
  • 1 egg
  • 1 teaspoon vanilla extract
  • 16 Oreo cookies, chopped
  • Topping:
  • 3 tablespoons all-purpose flour
  • 3 tablespoons granulated sugar
  • 5 Oreo cookies, finely crushed
  • 2 tablespoons cold butter
Instructions
  1. Preheat oven to 400 degrees. In a standard muffin tin, line 12 muffin cups (or spray with cooking spray) and set aside.
  2. Make topping: In food processor, combine flour, sugar and crushed cookies until combined. Add cold butter, pulsing until crumbly. Put in a small bowl and set aside.
  3. Make muffin: In a food processor, put flour, sugar and baking powder and process until combined. Add cold butter, and pulse until mixture resembles coarse crumbs. Pour into large bowl.
  4. In a medium bowl, whisk milk, egg and vanilla. Add to dry ingredients, mixing until just combined. Gently fold in chopped cookies.
  5. Divide batter evenly among prepared muffin cups. Sprinkle with topping. Bake for 15 to 18 minutes, or until a toothpick inserted in the center comes out clean. Cool muffins in pan for 5 minutes and then move to a wire rack to cool completely.
Notes
Source: Taste of Home


Chocolate Cheesecake Bars | alidaskitchen.com

Chocolate Cheesecake Bars

Chocolate Cheesecake Bars from Alida's Kitchen
These Chocolate Cheesecake Bars are made on the lighter side!  They are chocolaty, decadent and soooo good!
It’s been a while since I’ve shared a dessert, so to make up for that, I decided you deserve some chocolate.   Not just any old chocolate though ~ Chocolate Cheesecake Bars, and they’re made on the lighter side.  Despite being made light, each bite of these Chocolate Cheesecake Bars is chocolaty, decadent and sooooo good!

The hands on work takes all of 10 minutes, which is awesome.  First you start with a simple chocolate cookie crumb crust.  Then toss the rest of the ingredients the food processor (minus the chocolate chips, which are used for topping) and process until smooth.  Pour the filling over the crust, sprinkle with chocolate chips, and bake.  Easy peasy!  After baking, just chill the bars for a few hours, or overnight.  Cut into bars and enjoy!

Chocolate Cheesecake Bars
 
Ingredients
  • Cooking spray
  • 1 cup chocolate sandwich cookie crumbs (such as Oreos) - approx. 15 cookies
  • 2 tablespoons butter, melted (I used light butter)
  • 1 package (8 ounces) reduced-fat cream cheese
  • 1 cup reduced-fat sour cream
  • ⅓ cup unsweetened cocoa powder
  • 2 tablespoons cornstarch
  • ¾ cup granulated sugar
  • 1 teaspoon vanilla extract
  • 1 egg
  • 1 egg white
  • ⅓ cup semisweet chocolate chips (I used miniature)
Instructions
  1. Preheat oven to 325 degrees. Spray a 8-inch baking pan with cooking spray. Line pan with 2 strips of parchment (or waxed paper) set cross-wise in the pan. Spray with cooking spray again and set aside.
  2. In a small bowl, stir cookie crumbs and melted butter until moistened. Using waxed paper, press cookie crumbs into the bottom of prepared pan.
  3. In a food processor, blend cream cheese and sour cream until smooth. Add cocoa, cornstarch, sugar, vanilla, egg and egg white and process until smooth. Pour into pan and sprinkle with chocolate chips.
  4. Bake for 35 to 40 minutes, or until set (be careful not to over bake). Cool in pan on wire rack for 1 hour. Cover and refrigerate for at least 2 hours to overnight.
Notes
Notes: I made cookie crumbs by whizzing the Oreos in the food processor and then proceeded to make the filling - no need to wash in between. If you're gluten free, you can use gluten free cookies for the crumbs.

Adapted from Everyday Food, January/February, 2004

Chocolate Cheesecake Bars | alidaskitchen.com